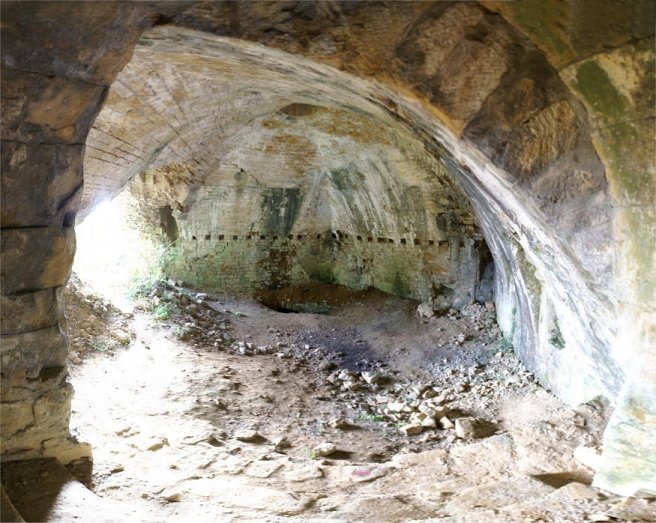
During the French Revolution, Louis XVI was captured at Varrenes while trying to reach Montmedy. After the Franco-Prussian War, Sere de Rivieres had underground barracks built at Montmedy.
|
A castle on the 100 meter high hill was built in the 1200s -
Mons Medium it was called. The castle was replaced by modern
fortifications by the Habsburg Charles V, with construction
starting in 1545. Upon Charles' death, Montmedy came under
Spanish rule, and the fortress was improved up until the mid 1600s.
A siege in 1657 attended
by Louis XIV, and in which Vauban was wounded while commanding,
captured the fort for the French. The French force
of 10-13,000 men had been up against only about 750, losing about
4,000! Vauban updated the fort
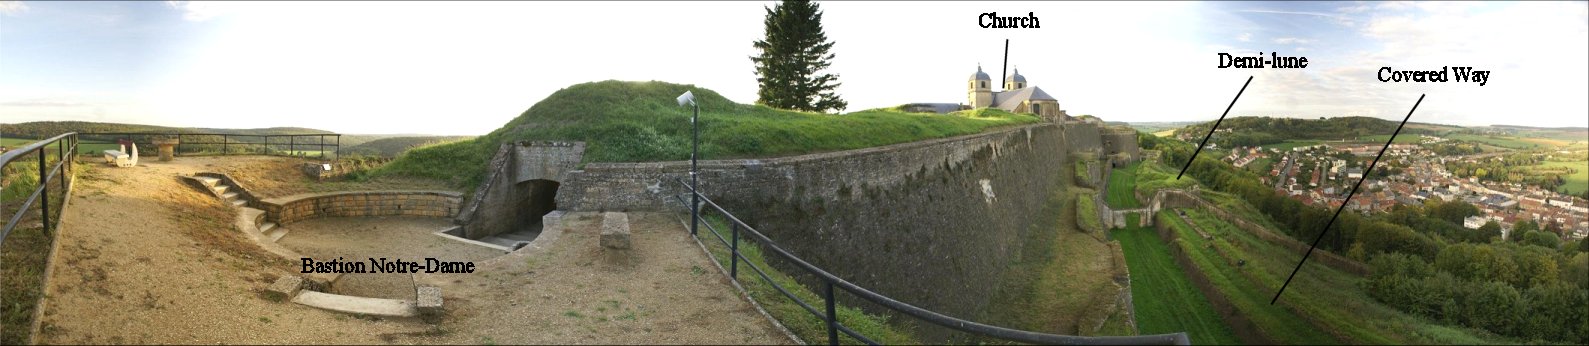
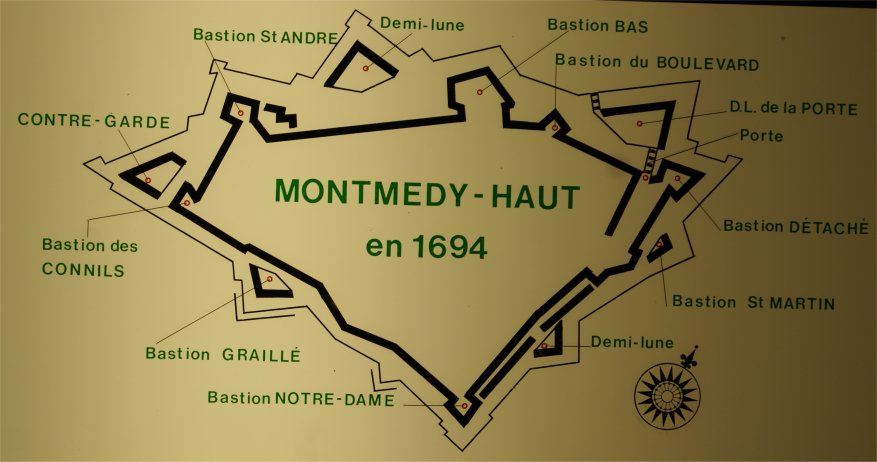
twice, in 1679 and in 1698, adding demi-lunes and widening the covered
way but not significantly altering the shape of the citadel. During the French Revolution, Louis XVI was captured at Varrenes while trying to reach Montmedy. After the Franco-Prussian War, Sere de Rivieres had underground barracks built at Montmedy. |

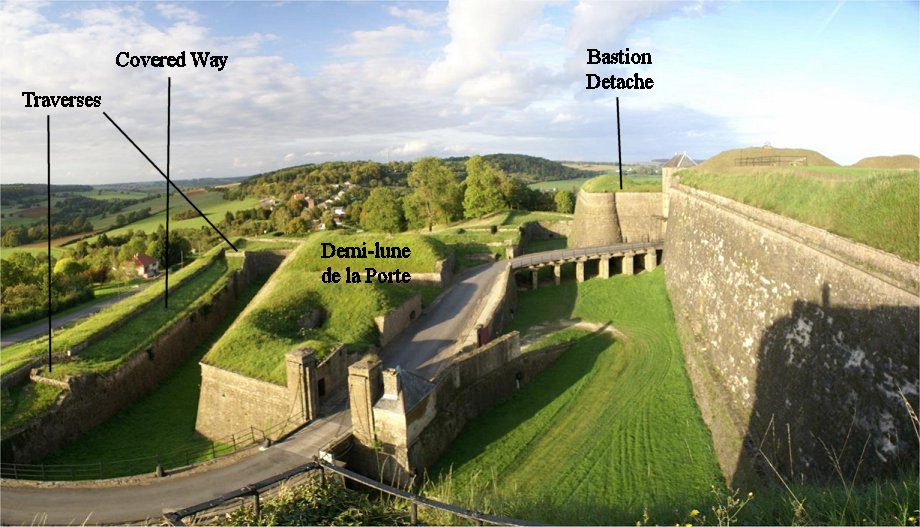

| Here you can see the full range of protection given to the gate - the demi-lune and two bastions. The gate, visible at right, has drawbridges for both vehicles and pedestrians! It dates to from the 16th to 18th centuries. The coat of arms of Charles V used to adorn the spot over the drawbridge. Now let's fly up to the gatehouse to see the view... | 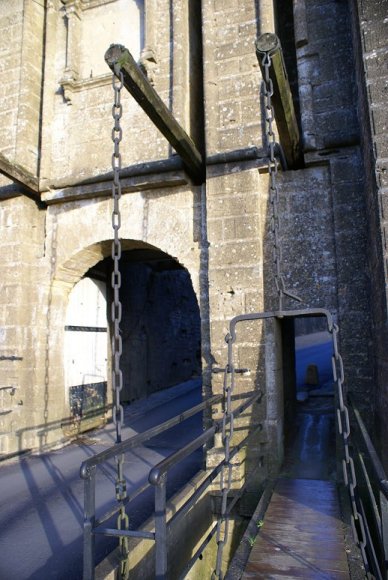 |
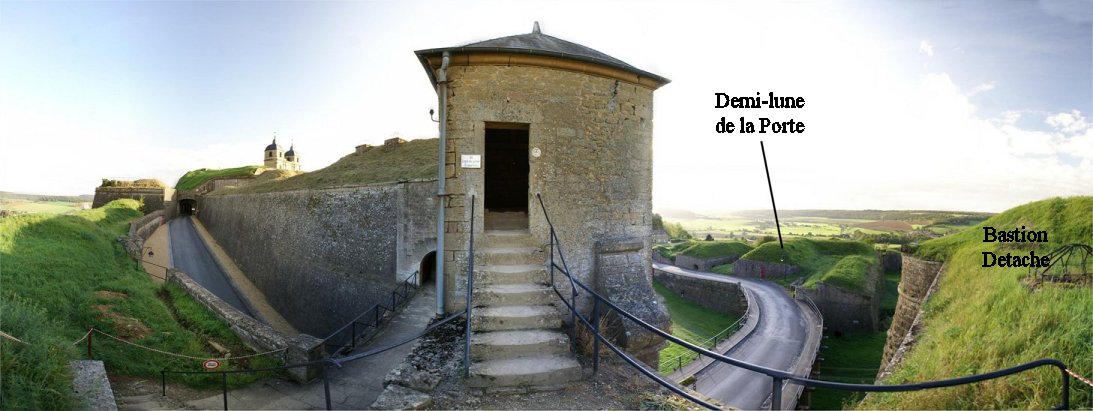

| Here we can see our progress so far. The Bastion St
Martin is in the ditch at right, obscured by the work that we are
standing on. The road continues between two walls and enters the
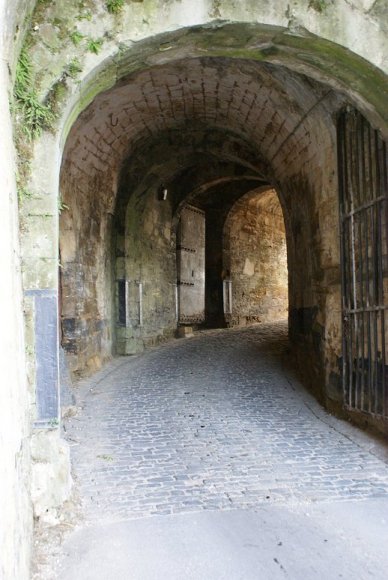
final gate (photo at right), which curves and emerges just before the
church. Let's go through the gate and inside the citadel... |
 |
 |
 |


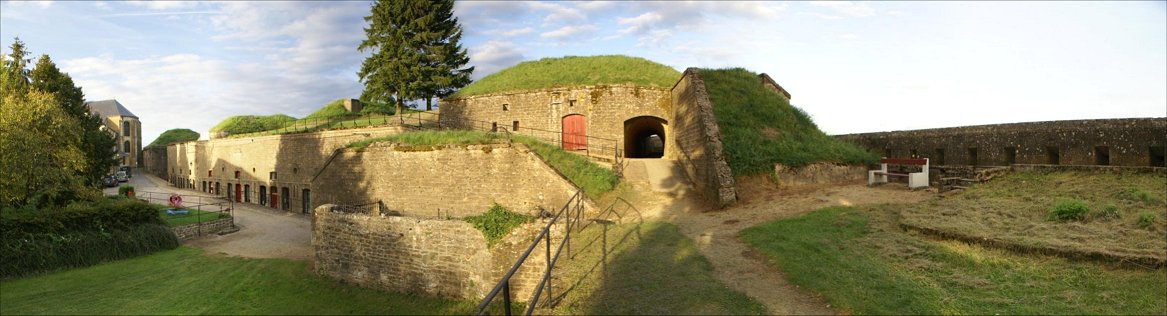
| For your orientation, the red gate at right in the panorama is visible in a previous
image from the other side. The church is also visible at far right. The mounds here with stonework and entrance doors serve as magazines but are also useful to protect the men on the ramparts from enfilade fire. We will continue along the path at left to the western side of the fort. |
 |

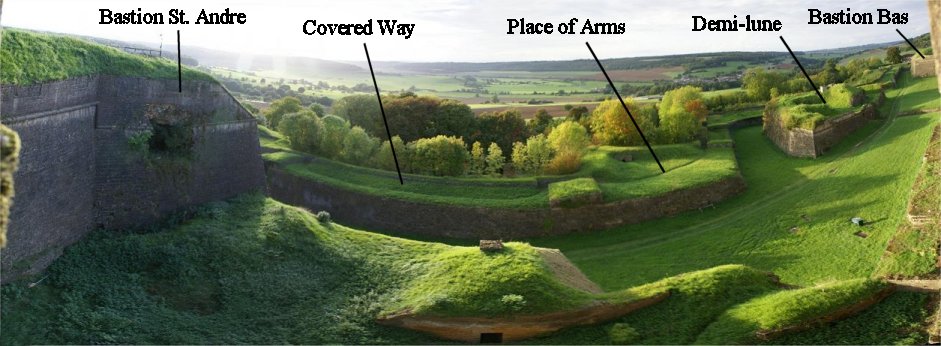
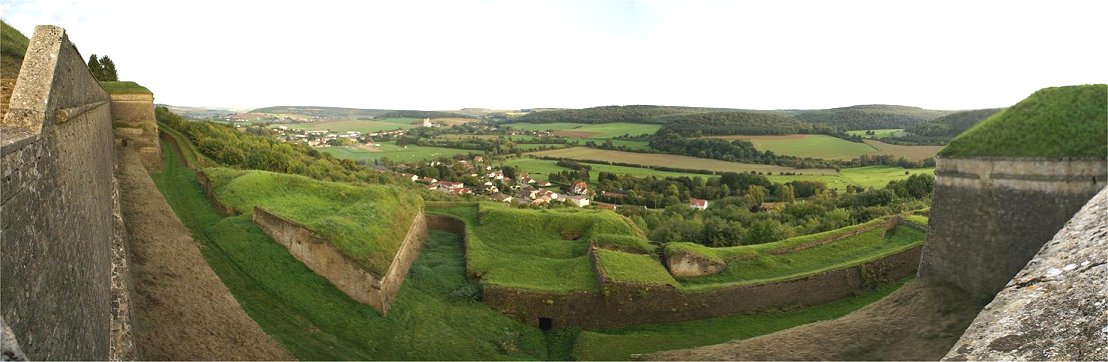
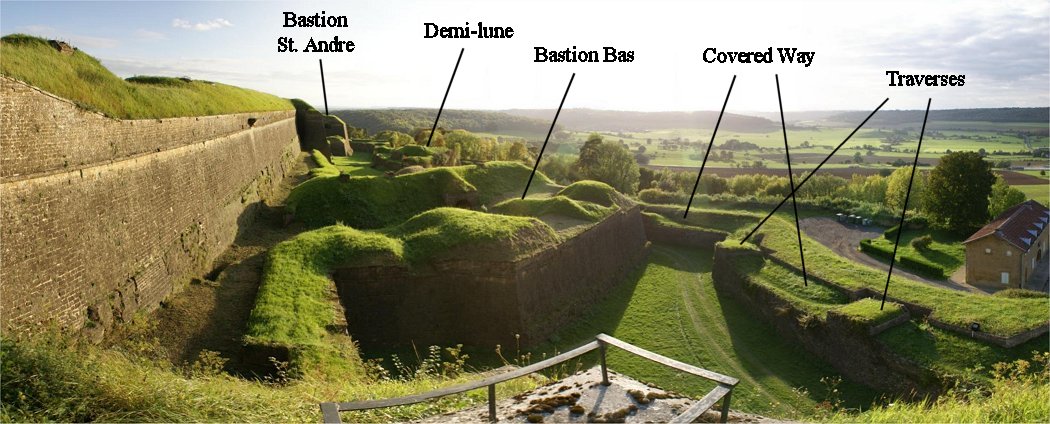
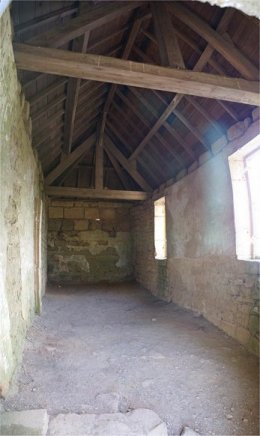
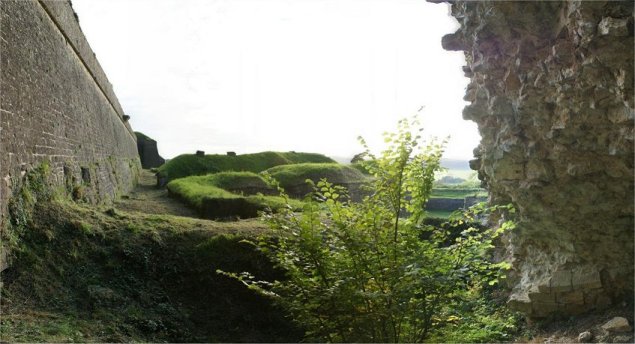
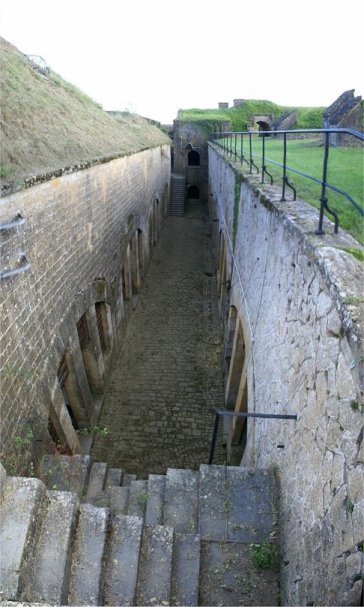
| Stepping in to the small room and looking outside we can see the Bastion Bas and a demi-lune from the direction that we came. To the left we see Bastion St Andre, where we will go next. Looking down we see a false bray, which extends to Bastion Bas. Two stairways descend from the false bray to a caponier that allows protected access to the demi-lune. This work, the Demi-lune of Porcs, was originally an earthwork, but Vauban had it rebuilt in stone. Across the ditch is the covered way, with traverses. The place of arms is a location where infantry could mass for a sortie. | 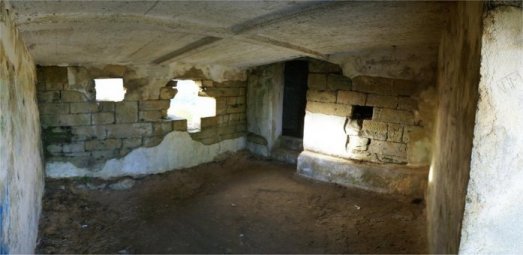 |


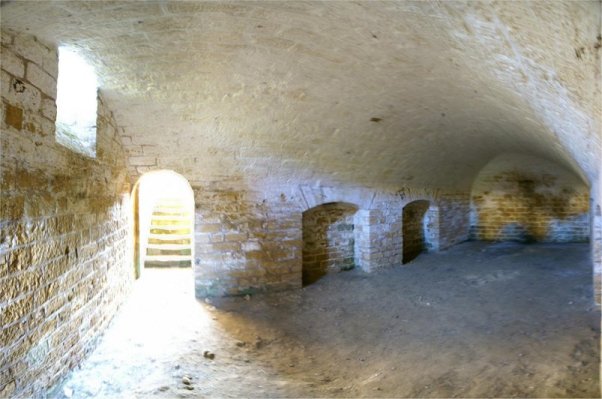
| We just came from the bench at the tip of the Bastion Connils at the left side of the panorama. Here you can see the assortment of earth covered buildings, Sere de Rivieres barracks, providing protection from enemy artillery. On the right side of the panorama down below is the Bastion Graille. | 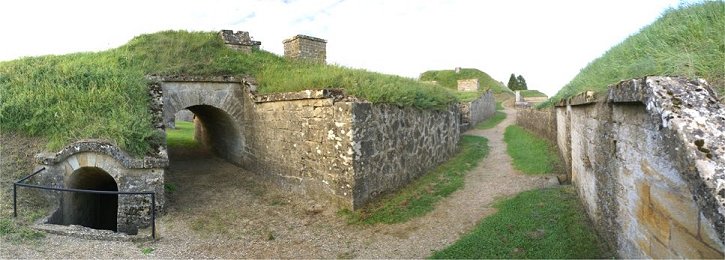 |
 |