Fort Ligonier


In 1758 British Brigadier John Forbes commanded a methodical advance to Ft Duquesne from Philadelphia.  Despite lobbying from Virginians like George Washington, Forbes eventually rejected the option of using Braddock's old road and instead planned an advance toward the French fort from Carlisle, building a new road west across the mountains and through the wilderness.  Braddock's advance had been quick, and he had not built forts and magazines along the way, so when disaster struck, his force had nothing to fall back for many miles.  Forbes decided on a slow advance, arriving at Fort Duquesne after the leaves had fallen and most of the French-allied Indians had gone home.  The route had meadows that provided forage for horses, and at 90 miles, it was shorter than than the 160 mile Braddock Road, which was in poor condition after several years of neglect.  The Braddock route involved two crossings of the Monogahela River, and it had the stigma of failure as well as the bones of the dead.  Forbes had forts built along the new route, including Ft Ligonier, at 50 miles, the closest of the forts to Ft Duquesne.  Originally known simply as the Loyalhanna Encampment, the place was named Fort Ligonier only in December 1758.  Today, most of the fort has been reconstructed, giving visitors an excellent look into 18th century frontier warfare.  The site also includes reconstructions of a number of mid-18th century British military vehicles and artillery, including items that you are unlikely to find anywhere else.

The French attacked and did significant damage to an advanced British force under Major Grant, and even attacked Fort Ligonier itself, leaving Forbes to decide to leave the completion of the expedition to the next campaign season.  Capturing prisoners, however, Forbes learned that his opponents were weak, under-supplied, and possibly preparing to withdraw.  This changed Forbes mind, and the advance continued, with the British arriving at the forks to find Fort Duquesne abandoned and burned.  Fort Frontenac on Lake Ontario had been captured by the British and the French lake fleet was destroyed, cutting off French western possessions like Ft. Duquesne.  In its stead, the British would build a much larger Fort Pitt on the site.  Both it and Ft Ligonier would be attacked by natives in Pontiac's Rebellion in 1763.  


Viewed from a cemetery on a nearby hill, the fort can be seen in the context of the terrain around it.  The hills here are typical of western Pennsylvania.  Surprisingly, higher ground overlooks the fort.  


A zoom view of the fort along with a mid-18th century map of the fort can help you better understand the layout.  The standard square design with bastions on each corner was used, but you can see that the simple stockade structure is replaced by a more substantial design at the bastion protecting the armory.  The square fort is surrounded by an outer retrenchment.  Due to the existence of the modern housing, the outer retrenchment is not reconstructed around the entire fort.  Similarly, detached outworks, then coming into fashion, are not reconstructed.  Wood, plentiful to a fault, was the primary building material.  


On the side of Loyal Hannon Creek, the outer retrenchment is atop small cliffs.


The cliffs continue for part of the north facing section of the retrenchment.


This is the south facing retrenchment, which faces relatively smooth terrain.  Three outworks were in front of this section of the fort.  Next, we will walk through the gate.


We just came through the gate at left through the outer retrenchment.  The square, bastioned fort is on the right half of the panorama.  Next, we will walk down to the Forbes Hut.


Forbes was seriously ill and delegated much of the work to his second in command, Col. Bouquet.  The Forbes Hut is believed to be where the ailing Gen Forbes stayed and where he interrogated the prisoners that revealed French weakness.  Some historians believe that Forbes was dying from stomach or colon cancer.  Behind the hut, the outer retrenchment angles at 90 degrees and faces west.  This section of the retrenchment is above the cliffs, and it features the East Battery and the West Battery, which we will see next.


This is the entrance to the East Battery, which projects outward from the Outer Retrenchment.  At left you can see the square fort, including its stockaded section along with a small part of its more substantially built section.


West Battery


From outside the fort looking south, the outer retrenchment is prominent.  Beyond it uphill are diagonal wooden poles called fraising.  These are in front of the Fascine Battery, an earthwork.  Stockade walls connect the Fascine Battery to the square bastioned fort.  Next, we will go to the Fascine Battery.


The prominent gate here leads through the stockade wall (note firing ports) that connects the Fascine Battery and the main square fort, a bastion of which is visible at right.  This stockade wall IS straight, but appears curved here due to the distorton inherent in panoramas.  The Fascine Battery is protected by a moat 7 feet deep and 12 feet wide.  A palisade wall provides an additional obstacle in the ditch, and fraising is also featured directly below the wall.  The battery gets its name from the long bundles of sticks, called fascines, that are used to build the wall.  As previously seen, fraising is used in front of the battery.  At left and left-center of this panorama are chevaux de fise, portable obstacles especially useful against cavalry but also useful in a setting such as this.  Next, we will continue through the gate.


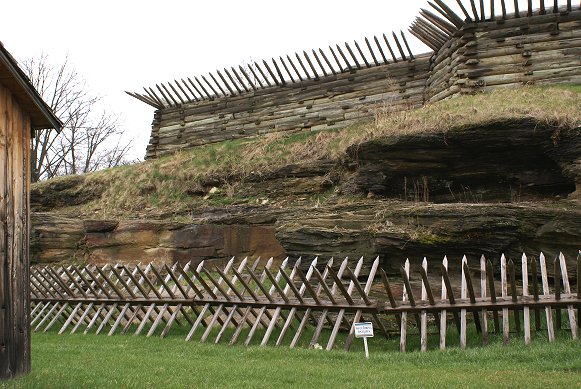
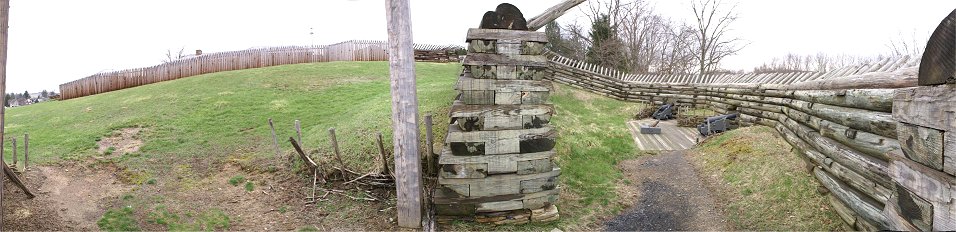
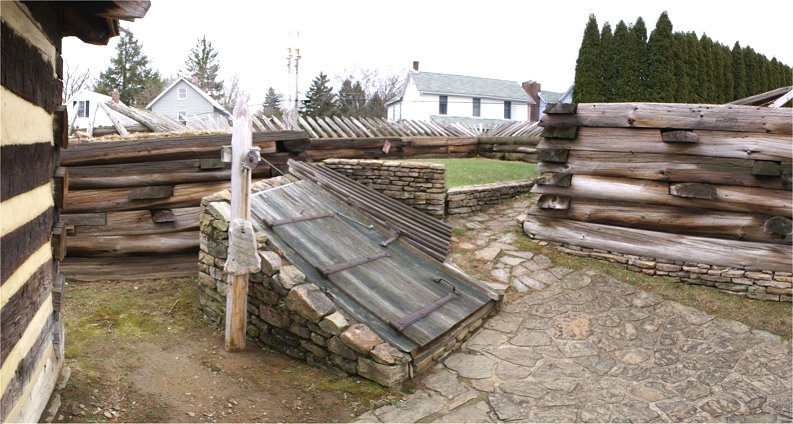
We just came through the gate at left-center in the above photo.  The Fascine Battery 
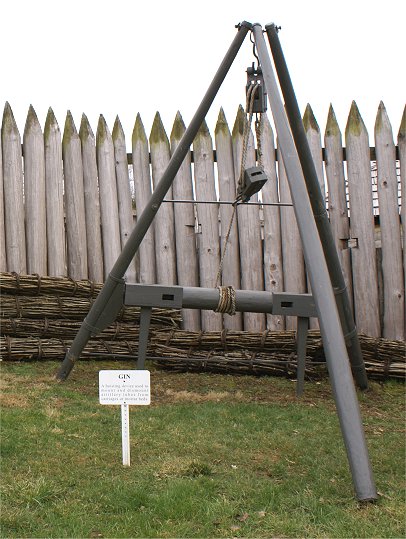
itself is at right-center.  The triangular device at left is a gin, used to lift artillery barrels off their carriages.  Also note the two 
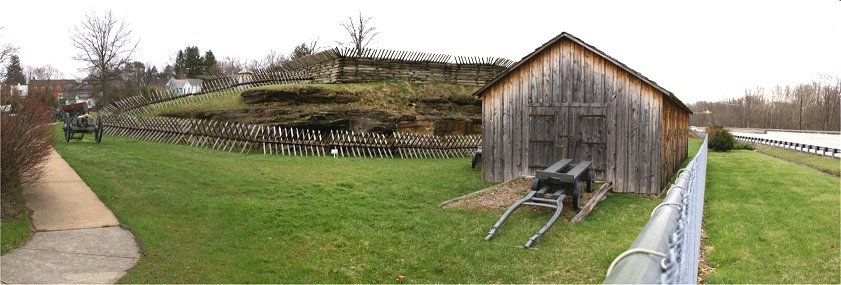
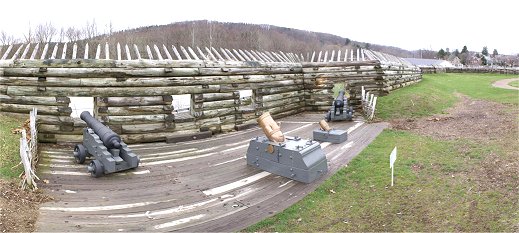
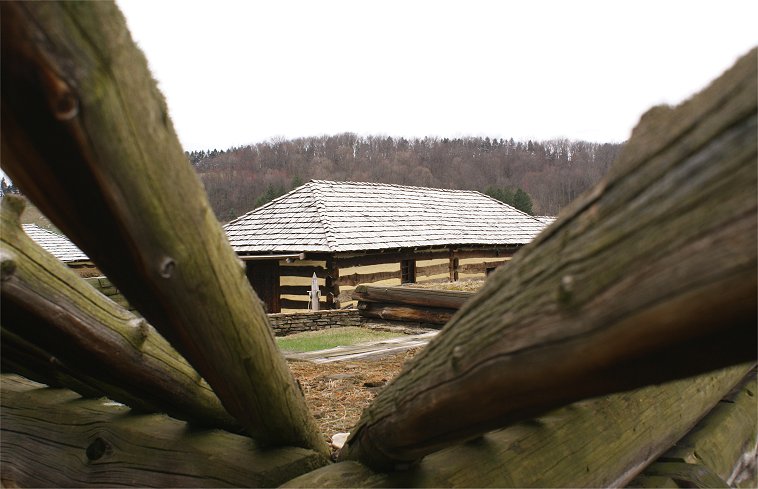
sunken mortar pits.

The photo at right shows several fascines in the foreground and another view of the stockaded ditch in front of the battery.

Now let's go inside the square fort.


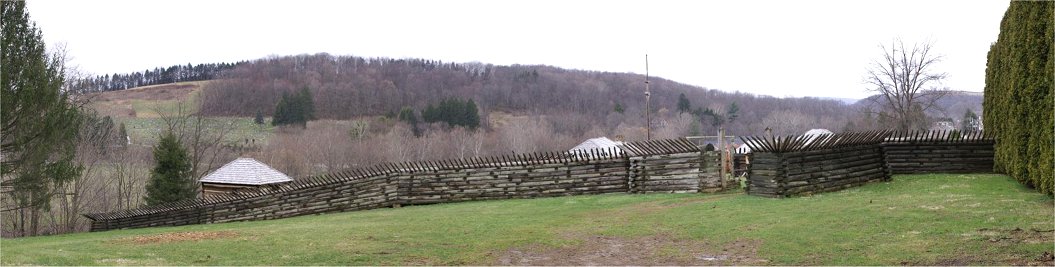
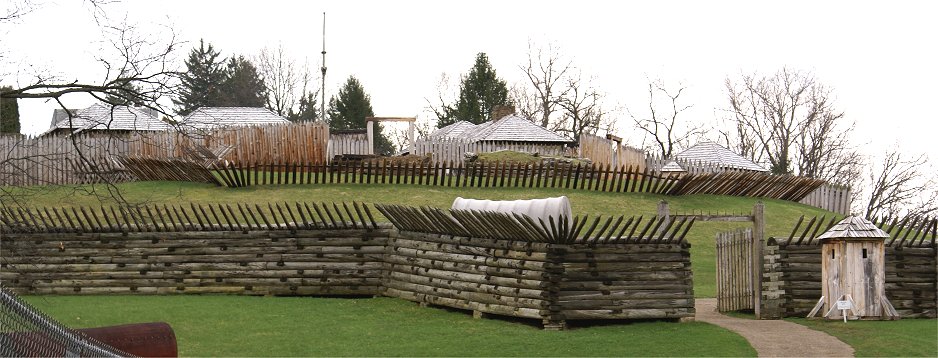
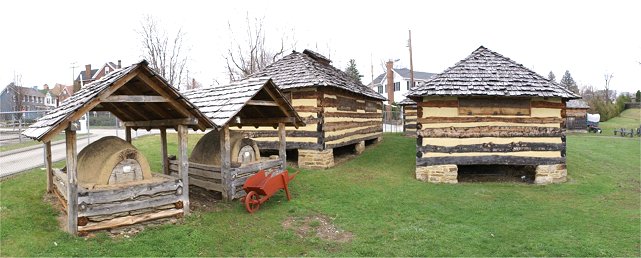
We just came through the gate on the right of the panorama.  This gate passes through the 
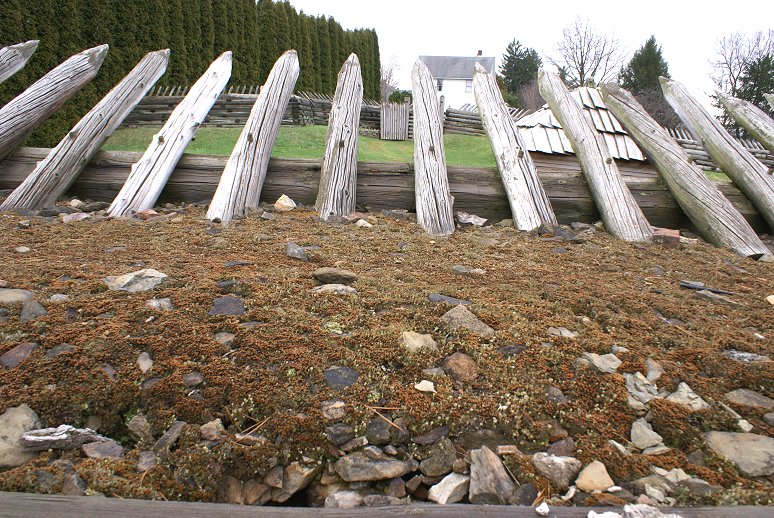
stockade portion of the square bastioned fort.  The gate at left passes through a much more substantial wall.  (See photo at right.)  
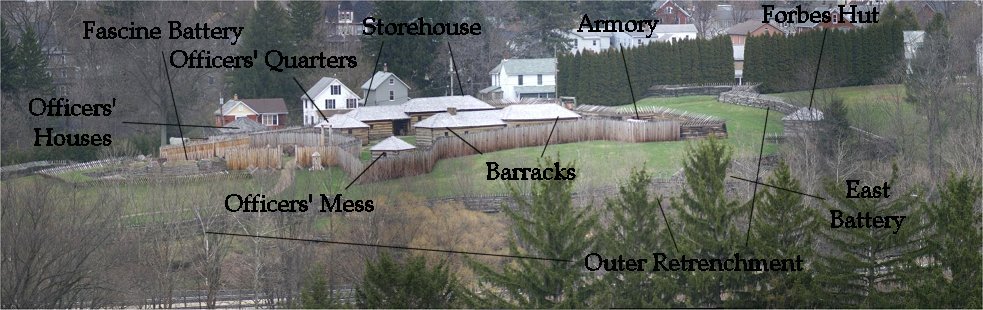
Inside the square fort is a storehouse, a barracks, officers' quarters, officers' mess, an armory, and the powder magazine.


As an afterthought in 1759 the fort's powder magazine, located in this bastion, was moved underground for safety.  


Taking care of 18th century armies was a difficult task.  Bake ovens are at left.  The two huts are hospitals.  


Ft Ligonier has an excellent and wide ranging collection of reproduction mid-18th century British army equipment.  Two hundred fifty years after the war, it is easy to look back and think of the military of that era as being quaint, but that does them a great disservice.  Then, as now, armies were complex instruments using the newest technologies.  The British military was involved in fighting from the wilderness of North America to the tropics of the Caribbean, the African coast, India, and the Philippines.  They also fought in Germany, Portugal, and raided the French coast.


This artillery wagon is of the standard British design for the mid 18th century.  Forbes imported some from England but had others built in Philadelphia.  They were fine for the roads of Europe, but in the backwoods of North America they were quite large, and the road construction had to account for these large wagons.


Conestoga Wagon

In response to the experience of the Braddock Expedition, the British procured Conesoga Wagons for the Forbes Expedition.  The Conestoga Wagon, developed in Pennsylvania in the early 18th century from both English and German wagons, were much better suited to the rough new roads through the hills of Pennsylvania.  Their smaller wheels allowed for sharper turning.  The curved bed gave it greater strength and eased the negotiation of steep slopes.  A toolbox and feed trough for the horses were usually included.  Although the British found that although the standard army wagon could carry 2,000 pounds, the Conestoga could only carry 1,200 to 1,500.  Despite this, it proved to be a better wagon for the area.   But for all wagon types it was found that full loads were not practical in the region.  Pack horses were also used. 


This is a reconstructed tunbrel, used to carry road building and engineering tools, among other things.  The mortally wounded Braddock had been carried from the field in a vehicle like this.


Armies required mobile forges for repairs and to work with horseshoes.


The carts in the middleground were used to carry artillery ammunition.  Guns any larger than 6 pounders were difficult to pull through the wilderness.


Howitzers accompanied the expedition.  The explosive howitzer shell follows a trajectory between the relatively flat trajectory of a cannon ball and the parabolic trajectory of a mortar bomb.  Most artillery that you see in battlefield parks do not have the limber that the horses pull and which is hitched to the trail of the artillery piece.  These pieces also accurately reflect the color of brass cannon - not the coroded green color most often seen.


Sled carriages were even designed to transport artillery in snowy conditions.


Mortars were useful during sieges, lobbing explosive shells over enemy fortifications.


A gin (left photo) was used to lift an artillery barrel out of its carriage.  A sling cart (center and right photos) was used to transport an artillery barrel for a short distance.


Copyright 2011 by John Hamill


Back to John's Military History Page