Ninety-Six

May 22 to June 18, 1781


Following Cornwallis' withdrawal to Wilmington after the battle of Guilford Courthouse in March 1781, he decided that the Carolinas could be conquered by occupying the source of supplies for the patriot forces - Virginia.  When the main British army in the South advanced into Virginia, the American commander in the South, Nathanael Greene, did not follow, but instead moved against British bases in South Carolina.  By late May, there were only two large British bases left in South Carolina, Charleston and Ninety Six, a trading town in the western part of the state.  Greene sent Harry Lee and Andrew Pickens to capture Augusta, Georgia while marching his roughly 1,000 man force to besiege the garrison of 550 Tories under Lt Col Cruger at Ninety Six.

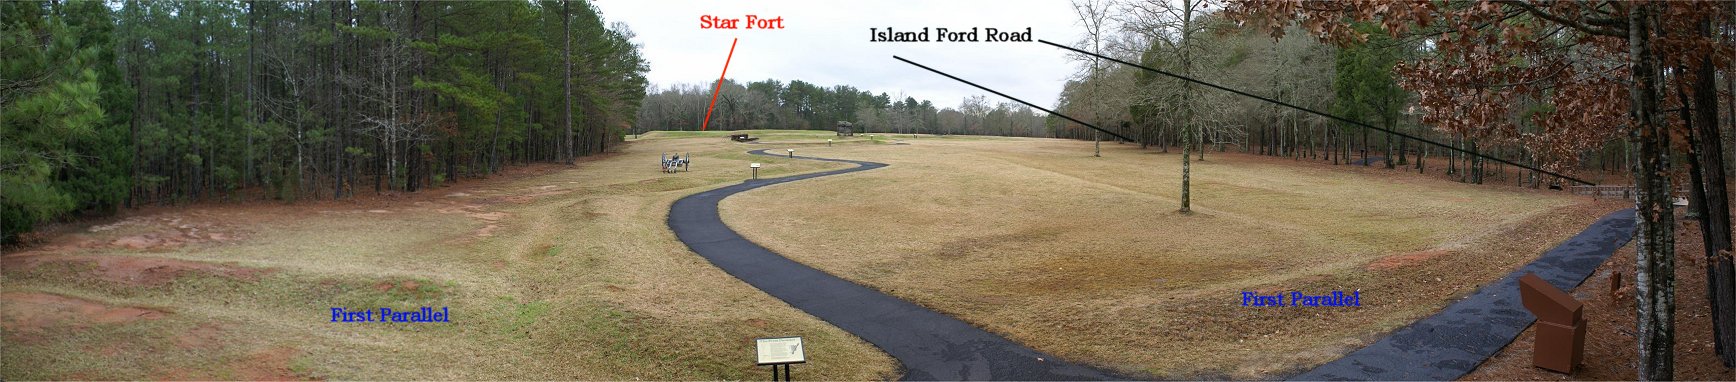
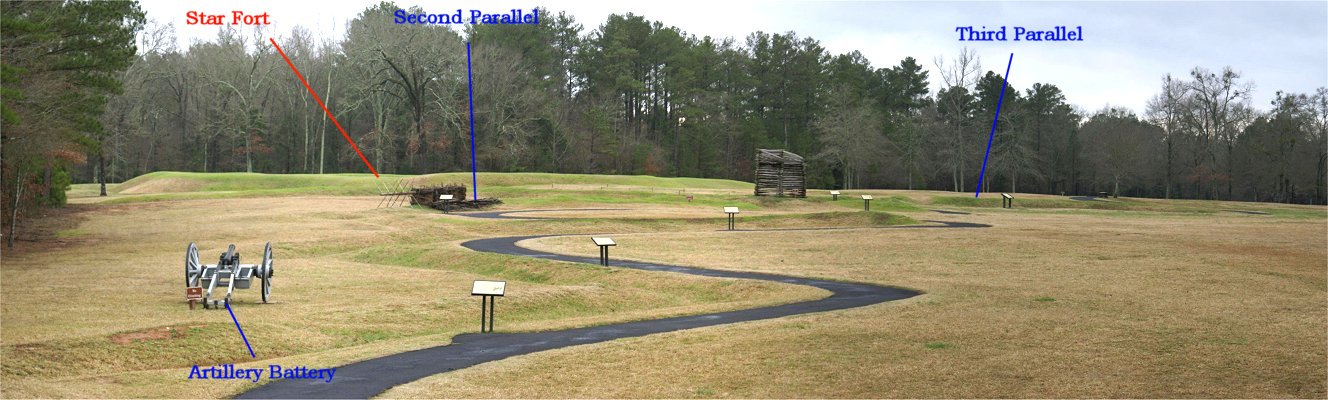
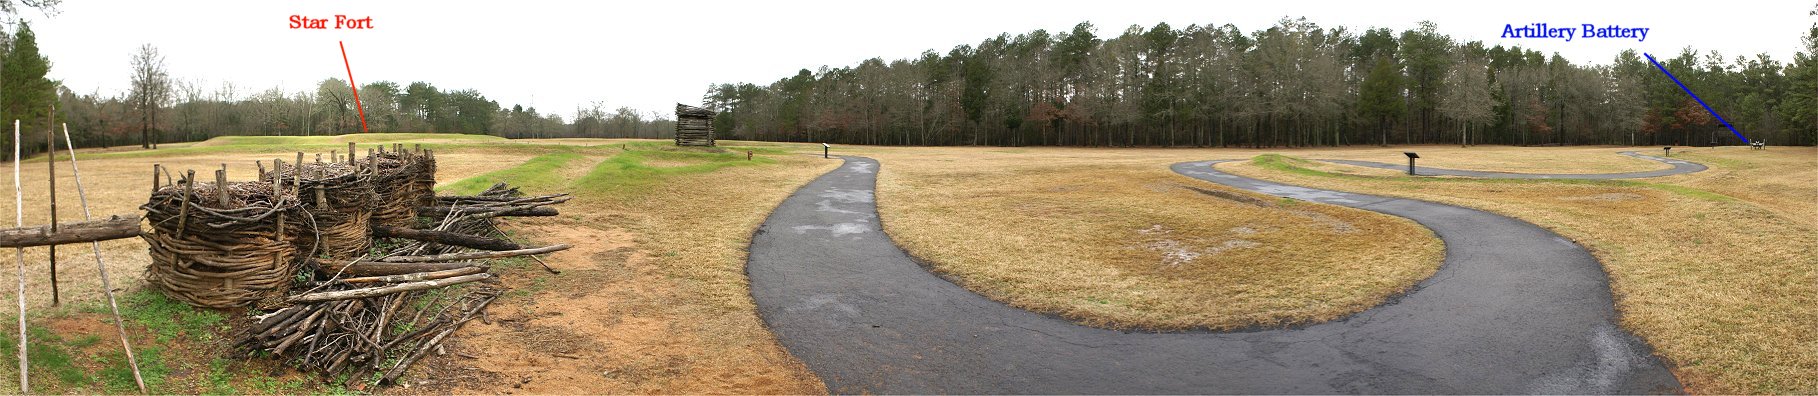
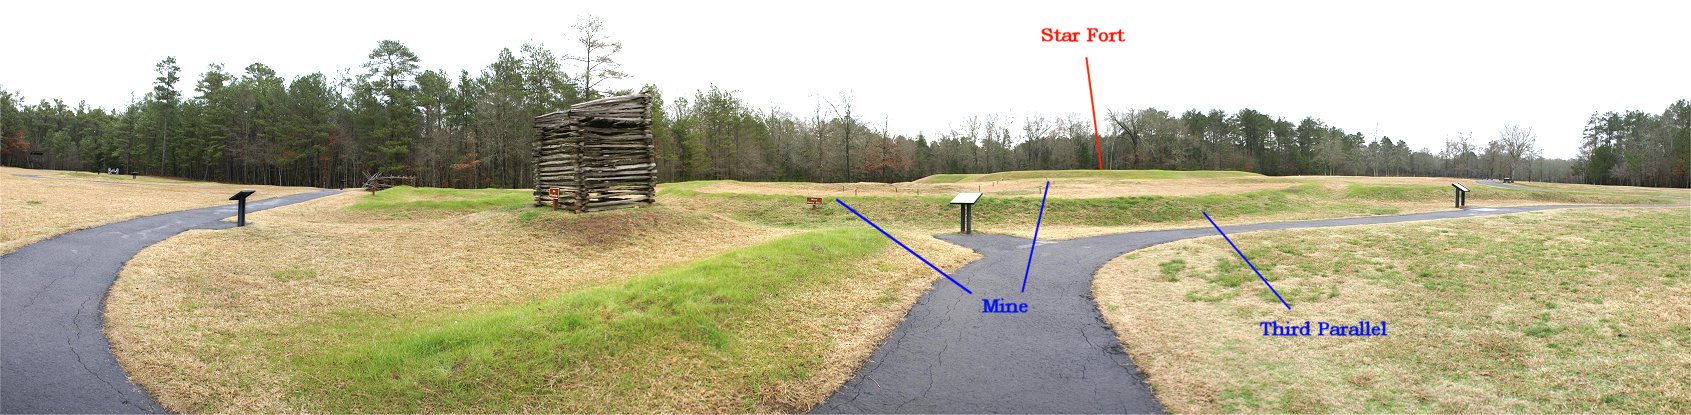
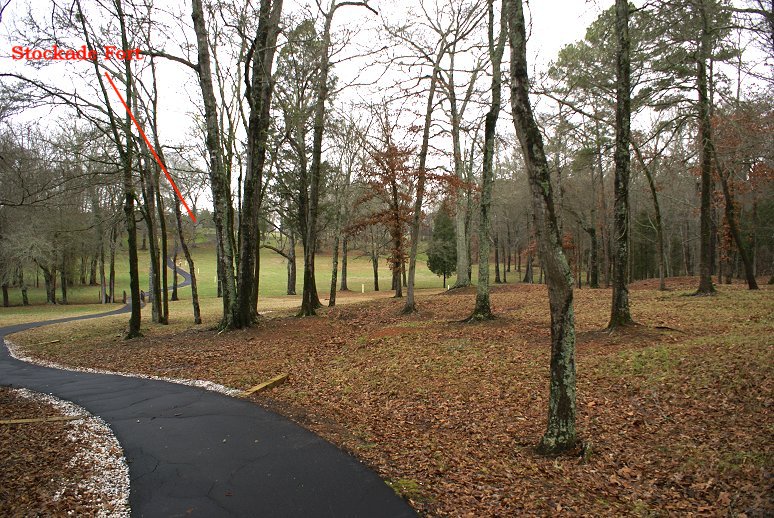
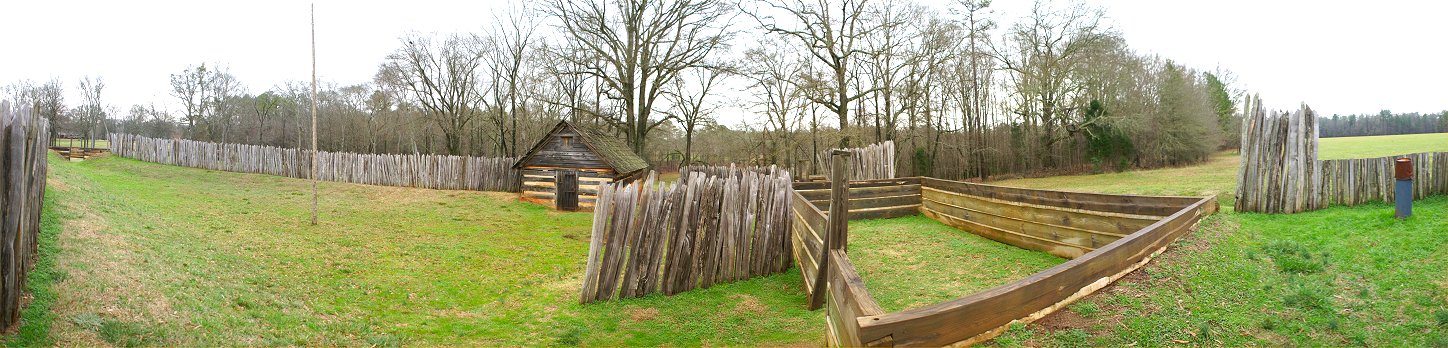
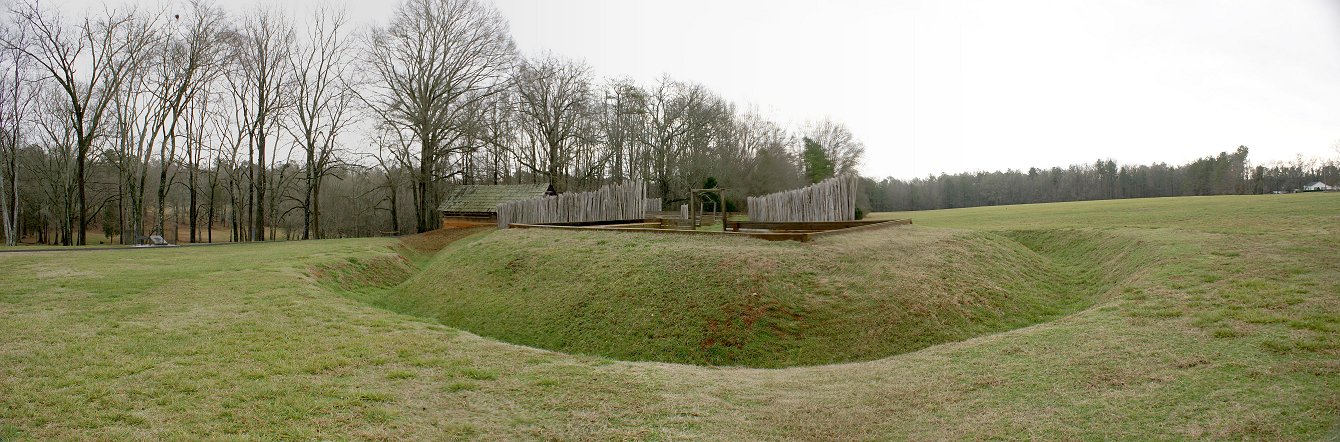
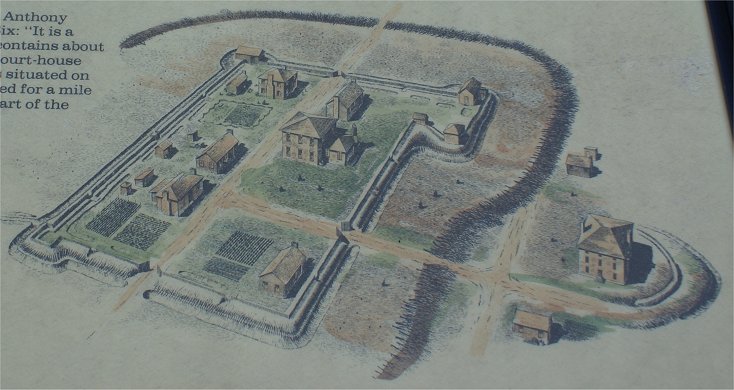
The town of Ninety Six itself was protected by a palisade, ditch, and abatis.  (See park service illustration at right.)  The main obstacles to attack the town, however, were two outworks, the Star Fort, positioned to cover the town palisade, and another fort which helped protect the water supply.  


View From Park Service Observation Tower

On the advice of his Polish engineer, Col. Kosciuszko, Greene focused his attention on the Star Fort.  On May 22nd, Greene's men approached to within 70 yards of the fort and began digging in.  A Tory sortie, however, drove them off and captured some of their tools and slaves.  On May 28th, Greene started over, digging the First Parallel, to the left of the Island Ford Road, the trace of which is visible at the tree line on the right of the panorama.  The First Parallel was finished on June 1st.  Approach trenches were then started toward the Star Fort, advancing toward the Star Fort with zig-zag approach trenches angled so that the enemy was unable to shoot down their length.  An elevated artillery battery, presumably containing Greene's four 6-pounders, was constructed where you can see the cannon.  Unortunately, 6 pounders were relatively puny for siege duty, and the clay soil that made up the fort was little affected by the cannon fire.  Also hindering the siege was a total lack of mortars to fire over the fort's parapet.  Additional batteries were constructed later, but their exact locations are unknown.  

As the siege continued, a second parallel would be dug, then a third very near the enemy fort.


Zoomed View From Tower


Second Parallel

About halfway to the fort, a Second Parallel was dug.  This one was much smaller than the First.  On the site, the park service displays chevaux de frise, an obstacle placed in front of fortification, gabions, which were wickerwork baskets filled with dirt to form a wall, and fascines, or bundles of branches placed on top of the walls.


Third Parallel

The digging of approach trenches continued.  On the right of the panorama, you can see the Third Parallel extending to the right of the approach trench.  Visible just to the right of the wooden tower, you can see the left portion of the Third Parallel.  This tower, called a Maham Tower, was built on June 13th, thirty feet high, so that riflemen could fire over the fort, making the fort's parapet untenable.  This technique had worked elsewhere, but here the Tories filled sandbags and raised their wall an additional 6 feet and fired hot shot to try to burn the tower.  Being made of green wood, the tower did not burn.  With artillery and the tower failing to make an impression, the Americans hoped for success with another siege technique, mining, which began on June 9th.  The small poles connected by rope mark the location of the tunnel, which still exists.  Unfortunately, the clay soil was difficult to dig, so the 125 foot long tunnel was not completed in time to blow the enemy wall with gunpowder.  Another expedient, firing flaming arrows into the town beyond the fort, failed to set the buildings on fire.


Storming Attempt

By this point, a British relief column was approaching, and Greene was leaning toward abandoning the siege.  The men, however, wanted to storm the fort.  In this panorama, you can see the Third Parallel extending from in front of the Maham Tower toward the lower left corner of the picture, and an approach trench, the right one of two, extends toward the fort.  In this area, the attack was made on June 18th.  The forlorn hope, made of around 50 men, was to cut through the abatis, or fell trees, cut through the fraising, or sharpened logs protruding from the walls, and pull down the sandbags with hooks.  The attack was a fiasco.  Taking fire from their front, then attacked by a sortie on their flank, the forlorn hope lost half its men, and the attack failed.  An attack was also made on the Stockade Fort on the other end of Ninety Six.    


This is the view from the rear of the Star Fort, where you can see its star shape, which allowed a crossfire to be laid down on attackers.  The paved trail on the left extends to the town of Ninety Six.


Inside the Star Fort

This is a 360 degree view from atop the parapet of the Star Fort, a rare original Revolutionary War earthwork.  During the war, the walls were 14 feet high - and steep.  The traverse in the middle of the fort was a position that the defenders could take in the event that the enemy captured the wall.  During the siege, the traverse provided protection from the American riflemen in the tower.  You can see the Maham Tower and the left approach trench from the American Third Parallel.  As you can see, the left approach trench nearly reached the fort's ditch.  On the far left, and far right, of this 360 degre view are the remains of a well that the defenders attempted to dig.  The garrison gave up the effort after failing to find water at 25 feet.  The water supply was something that Greene tried to attack  when Harry Lee arrived after successfully capturing Augusta.


This is the view from just outside the town walls looking down to the stream that provided water to the garrison and residents.  Slaves were stripped naked and sent to the stream to fetch water, their dark skin hiding them from view at night.  On the far ridge stood the Stockade Fort, which was connected to town by a communication trench.   If the Americans could capture the Stockade Fort, they could elimate the Tories' water supply and potentially force their surrender.  


Stockade Fort

When Harry Lee arrived on June 8th, he was tasked with capturing the Stockade Fort.  Lee bombarded the fort and dug approach trenchs that would reach 37 yards of the fort.  On the 12th, Lee sent 13 men to set the abatis on fire, but only one of these men would survive the effort unscathed; the other twelve were killed or wounded.  On June 18th, as part of Greene's assault, Lee captured the fort.  But with no success at the Star Fort and a 2,000 man British relief force on the way, Greene had to abandon the siege.  Greene's army marched away on June 20th, and the relief column arrived on the 21st.  It had been a frustrating defeat for Greene, who lost 154 men during the siege compared to 85 for the Tories.  But like most of Greene's defeats, this one would have few negative repercussions.

Lord Rawdon, leading the relief column, would order the abandonment of Ninety Six in July and withdraw British forces to the coast.  By the fall, the British held only Charleston, and Cornwallis's surrender at Yorktown, effectively ended the war.


Back to Revolutionary War Virtual Battlefield Tours