
Aldie, Middleburg, and Upperville - Part4
Upperville - Trappe Road
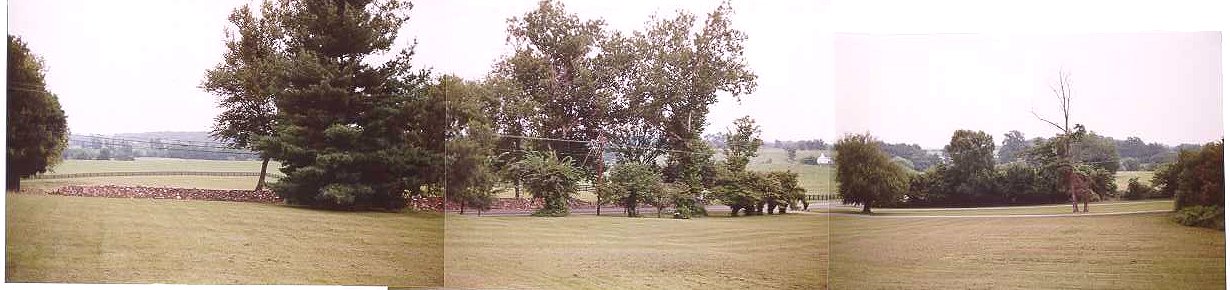
The Union advance continued, with the main force moving west along the Ashby Gap Turnpike while Gamble's and Devin's brigades of Buford's division moved west on a route north of the pike. North of Upperville, Buford saw in the distance the Trappe Road which headed north from Upperville. Wagons and troops were visible on the road and posed an inviting target and provided a shortcut to the Confederate line of retreat through the Blue Ridge at Ashby Gap. This is the view from the Trappe Road. Chambliss's brigade deployed on a small hill behind the cameraman, but the 1st NC and 10 Va. Cavalries did not have time to follow because of the stone fences at the road. These regiments remained on this field facing the Federal attackers. Jones' brigade and Chew's battery were deployed at a stone wall somewhere near the woods on the left side of the picture facing toward the right side of the picture.
In the area not visible beyond the top of this plateau, a sunken road ran diagonally from the Ashby Gap Pike to the Trappe Road. Buford used this as a protected approach and as a post for his dismounted skirmishers, and he charged the Confederates. The Rebels responded with their own charge, stopping Gamble's attack, forcing his men back to the sunken road, and giving Chew time to move his guns to the other side of the Trappe Road. Devin's brigade now arrived and attacked the Trappe Road, forcing the Confederates from the field.
Upperville - From Vineyard Hill
This is the view from Vineyard Hill along the Ashby Gap Turnpike looking east. Stuart posted Hampton's brigade here and Robertson's on the left side of the road. As Buford's brigade moved toward the Trappe Road along the fields to the left of Robertson, Robertson's brigade panicked and fled, leaving Hampton to face Kilpatrick's brigade alone. Hampton shifted troops to the other side of the Pike to compensate. Kilpatrick was charging to exploit Robertson's flight but was himself flanked and forced back. An attack by the 1st and 6th US Cavalries on this side of the Pike failed, but a Confederate counterattack was repulsed by Union artillery.
Kilpatrick was starting another attack when Hampton's brigade withdrew. Since Chambliss and Jones had successfully retired, there was no need to hold Upperville any longer. Stuart took up position at Ashby Gap after a four and a half mile pursuit by Gregg. Although the Gap was held, Buford sent a company to the crest of the Blue Ridge which saw Longstreet's men in the Shenandoah Valley. This was important information for the Union high command, but was too late to prevent an invasion of the north. After Brandy Station and the three lost fights at Aldie, Middleburg, and Upperville, Stuart's reputation suffered. Some people believe this affected his judgment in the next few days, with Stuart encircling the Union army and depriving Lee of most of his cavalry at Gettysburg.
topo map The Furr House at Aldie is located just northwest of the intersection of the Snikers Gap Road and Route 650. The fight at the wall was at the curve in the Snikers Gap Road just beyond the house.
topo map The wartime bridge over Goose Creek was just north of the modern Route 50 crossing and is shown with dashed lines. The Confederates defended the western side.
topo map Upperville - The Trappe Road photo was taken from near the 530 elevation marker along Route 619. The Vinyard Hill photo was taken south of Route 50 opposite the Ivy Hill Cemetery and looks east.