Second Winchester and Stephenson's Depot
June 13-15, 1863
After Chancellorsville, Lee decided to take his army north into Union territory. Covered by Stuart's cavalrymen, who would clash with their Union counterparts at Aldie, Middleburg, and Upperville, Lee began shifting his infantry west into the Shenandoah Valley, starting with Ewell's Second Corps. From there, they would move north, cross the Potomac and advance into Pennsylvania behind the cover of the mountains, then move east into the south central part of the state.
But first, the Confederates had to deal with the 6,900 man Union division under the mentally unstable and widely hated Maj. Gen. Robert Milroy at Winchester in the northern end of the Shenandoah Valley. Faced with overwhelming numbers, Milroy should have withdrawn (he was ordered to), but he didn't. Instead, he gave the Confederates an excellent opportunity to surround and capture his men.
Ewell's 19,000 man Second Corps marched into the Valley through Chester Gap near Front Royal. On its way north to Martinsburg, Rodes' division would move around Winchester to the east - through the town of Berryville. Ewell's other two divisions, those of Edward Johnson and Jubal Early, moved on Winchester from the south, on the Front Royal Pike and Valley Pike respectively, clashing with Milroy's men on June 13th.
With forts along a ridge just east of town, Union defenses
were extensive and impressive. Milroy was confident that he
could hold Winchester, but with such overwhelming numbers against him, if the
fight didn't go well, a Union escape would be difficult.
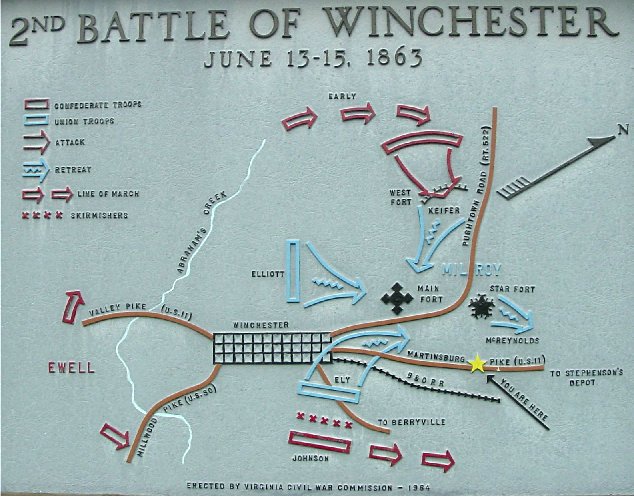
Map
Here's a map
of the battle. For June 14th, Edward Johnson's division approached town from the east
and pushed the Yankees back into their works, but fire from the Main Fort halted
further progress. Although not shown
here, Gordon's brigade demonstrated against the southern end of town near
Bower's Hill, the scene of the First Battle of Winchester. Ewell had
seen that West Fort was the key to the Union defenses, and Early convinced him
of his plan to take 3,600 men in a sweep to the west to capture it.
Next, we will follow
Jubal Early with three brigades and some artillery doing just that.

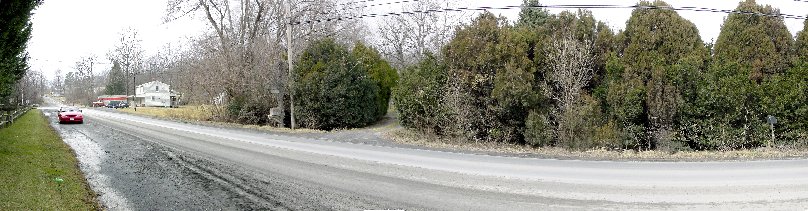
Early Turns Off Cedar Creek Grade at Cloverdale Farm
Although the Yankee defensive lines were reasonably well sighted on ridgelines near town, the Confederates would also use the area's geography to their advantage. West of the Union occupied ridge was another ridge, Apple Pie Ridge. Marching west along the Cedar Creek Grade, shown here, Early's division crossed Sandy Ridge, visible on the right half of this picture. Just a few hundred yards to their left, or south, along Sandy Ridge was the site of the First Battle of Kernstown, fought a year and a quarter before.
Continuing west along the road they crossed another ridge, parallel to the Sandy Ridge, called Apple Pie Ridge. This is the prominent ridge in the center of the picture. The low blue mountain visible on the left is Little North Mountain, the beginning of the Allegheny Mountains. Early planned to use little known and little used country roads behind Apple Pie Ridge to shelter his troops from enemy view and gain surprise. So Early's men turned right down the modern gravel driveway, and headed north through the Cloverdale Farm.
Dr. Lupton's House
Here, from left to right, Early's men crossed the old Romney Road, the route from Winchester west to Romney, the objective of Jackson's failed campaign a year and a half earlier. Behind the large evergreens and down the driveway is the 18th century stone house, Walnut Grove, then owned by Dr. Lupton. (Like the previous stop, this house is private property.) Lupton had kept corn in the attic for the much hoped-for arrival of Confederate troops, but squirrels found the food, the presence of which had alerted the Yankees to the secret stash.
Reaching this point, Early was told that Federal pickets
were just half a mile away, so he left the 54th NC here and continued north with the
help of a local guide.
Back to Civil War Virtual Battlefield Tours