Yorktown Part 2
|
|
|

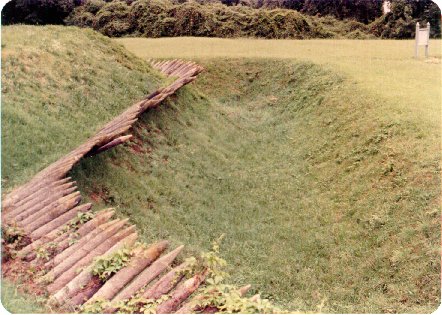
Fusiliers' Redoubt
On September 30th, the day the British outer works were found evacuated, a mounted group including General Scammell clashed with Tarleton's cavalry to the west of Yorktown. Although taken prisoner, Scammell was killed by the British cavalrymen. The same day, British pickets were driven in near the Fusiliers' Redoubt.
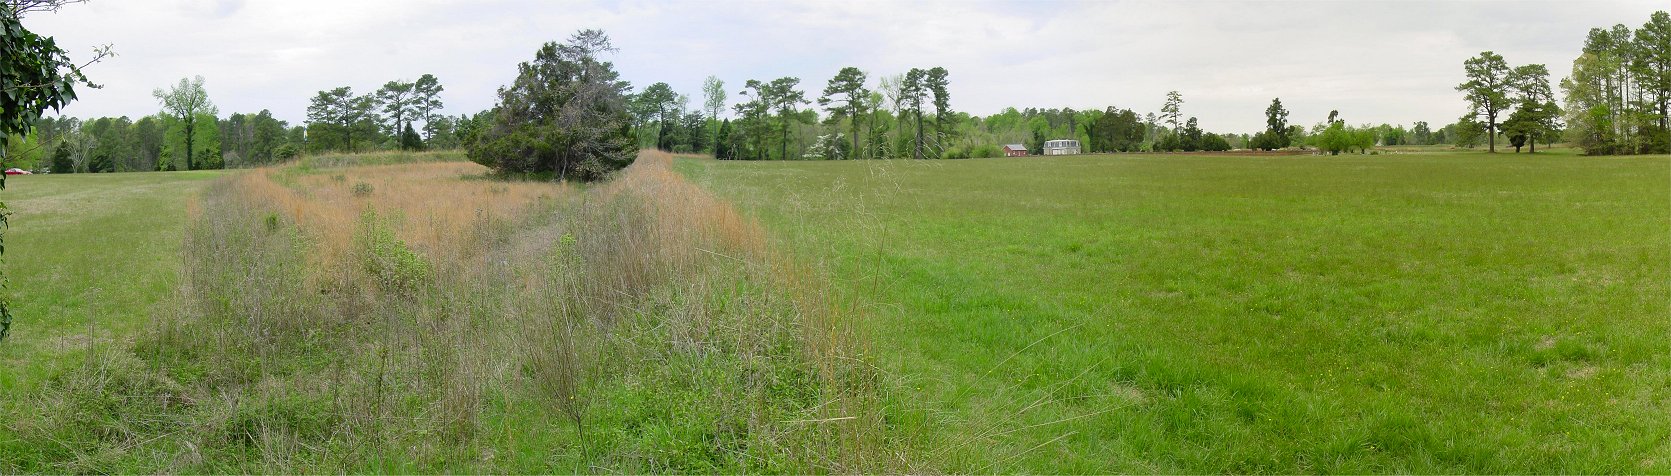
Although Cornwallis abandoned the Untouched Redoubt, the Pigeon Hill redoubts, and Wormley Creek, he retained Redoubts 9 and 10 several hundred yards east of his inner defenses and the Fusilier's Redoubt to the west - across Yorktown Creek. On October 6th, the allies began digging siege lines on the eastern defenses. Diversions were made at the British post at Gloucester Point across the York River and here at the star shaped Fusilier's Redoubt. French troops under Saint-Simon dug siege lines and batteries facing the redoubt, and had plans for zig zag approach trenches toward the fort. Although the fort held out against several attacks until the end of the siege, French efforts here helped block any potential breakout tot he west of town.
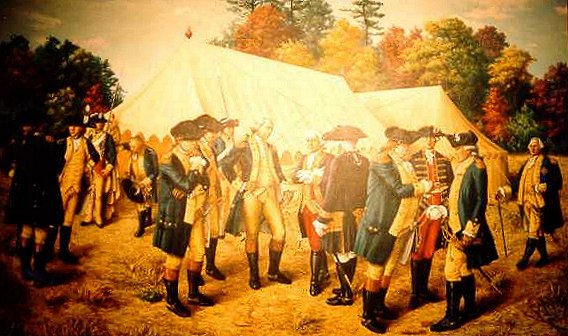
Washington
This is a painting in the NPS Visitors' Center portraying Washington and important officers of his army. Next to Washington is Rochambeau who put himself under Washington's command and cooperated with and assisted Washington in any way he could. On the far right of the picture is "Baron" von Steuben who had lied about his aristocratic title and his Prussian army rank and experience in order to get a commission in the Continental Army. Steuben had brought discipline and professionalism to the army at Valley Forge, and his contributions were vital to winning the war. The rotund gentlemen in the right center foreground is Henry Knox, who went from being a Boston bookseller to head of all Continental Army artillery. He had created a respectable artillery arm out of nothing and would become the nation's first Secretary of War. His gluttony would lead to his demise when a chicken bone lodged in his intestines.

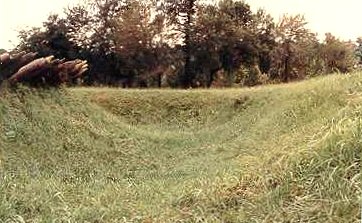
Defenses and Siege Lines
This is the NPS diorama of the British defenses, with north to the right. The marshy Yorktown Creek is visible as the wooded area on the upper portion of the photo, and the Fusilier's Redoubt is on the upper right. The town of York was on bluffs overlooking the river, and these bluffs anchored the left of British line, near the Visitors Center. The focus of the Allied siege was between the bluffs and the Hornwork, which was a salient where the lines angle back to face Yorktown Creek. Not visible in this model, Redoubts 9 and 10 were several hundred yards in advance of the inner defenses near the bluffs. When the siege entered full swing, Cornwallis and many town residents took refuge in caves below the bluffs in town.
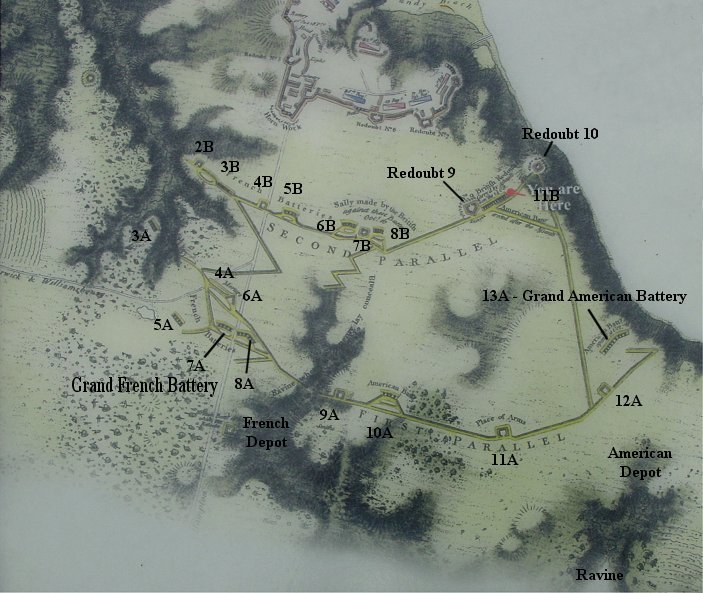
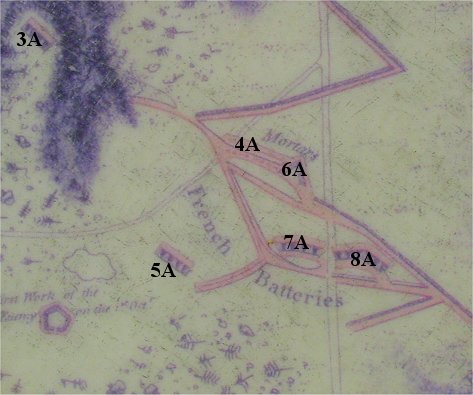
Map of Siege Modified with Park Service Designations For Structures
On the bottom right of the map is the ravine used by the Americans as a depot for digging their section of the 1st Parallel. In the lower center is the ravine used by the French for the same purpose. No other army in the world could match the French in siegecraft, so they constructed most of the earthworks and manned most of the batteries. The 1st Parallel was begun on the night of Oct 6, and by Oct 9 the French opened fire from their Grand French Battery. Soon thereafter, George Washington fired the first American shot from the Grand American Battery, and history records that this shot killed.
To better understand the earthworks shown in the panoramas below, match up the designations on them with those on the map above. All "A"s are on the 1st line, "B"s are on the 2nd line constructed later, and numbers generally proceed from left to right. These are not names used during the siege, but rather ones given later for archeological investigations and park service use.
Grand French Battery
Right Flank of Grand French Battery
This is the view looking up to the small rise the 8A sits atop. A small ravine behind the camera leads to Wormley Creek and was where the French maintained a depot used to begin construction of their section of the 1st Parallel. Somewhere on the opposite side of the ravine was the American sector.
Here, the 1st Parallel splits, with a line heading to the rear of the 8A battery complex, and another to the front of it for the infantry which helped protect it. The car on the left is behind the battery, and the Civil War era National Cemetery on the right is in front followed by earthworks of the 2nd Parallel built a few days after the 1st.

Largest Battery of the Grand French Battery
8A, the largest battery of the Grand French Battery, was built in a V-shape. Traverses, which protected against flanking fire, separated three sections of the battery. Four guns were in the section on the right of the panorama - near the road. They faced the Hornwork, the most important part of the British inner defenses. Several cannon, mortars, and howitzers were in the two sections on the left of the picture, although accounts differ as to how many, and composition of the batteries probably changed over time. These weapons could be aimed at Redoubts 9 and 10, which would have to be reduced in order for the siege to advance. Stakes and ropes were used to help reduce the recoil of the guns.
Looking back along the line on the left of the pan, you can see the low ground or ravine which was the French base. The woods did not exist at the time. The support trench to the rear was a fall back line for the gunners in the unlikely event of a British attack. On the far right across road is 7A on high ground, which we will soon see.
| Archeology in the left portion of 8A revealed the possible existence of a "stone mortar" mounted on a rail carriage which could be pivoted to fire in a 180 degree arc to protect the area from British infantry attack. |
 |

|
 |

Between Hampton and Goosley Roads
This is the view from in front of 7A, which is on relatively high ground. To its front ran a trench extending from 8A across the road to 6A, which was a redoubt designed to help protect the artillery batteries. Beyond 6A was 4A, a mortar battery. Beyond the Goosley Road, the land dropped off to Yorktown Creek, and although not reconstructed, battery 3A was built atop a ravine there, and it mounted four 24 pounders.

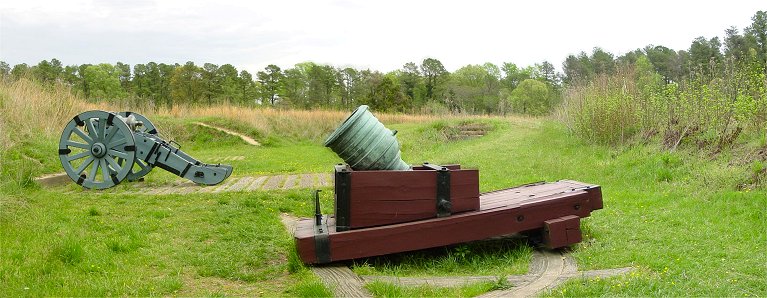
Battery 4A
This is the view from atop 4A, the mortar battery. It could hold up to eight mortars and was relatively late in opening on the enemy - October 11th. You can see the reconstructed platforms and two magazines inside as well as a protective support trench to its rear. Triangular shaped Redoubt 6A is next door, and battery 7A is on the hill to the rear.
Doctrine dictated that since the enemy might concentrate on a single siege battery if it opened fire on its own, it was best to wait until overwhelming force was available. Work had progressed quickly, and by the afternoon of October 9th, many of the batteries were ready to open fire. At around 3pm, guns of the French Grand Battery opened fire. Two hours later the Americans opened fire with George Washington firing the first shot, a cannonball which killed the Commissary General and took the leg off another officer as they dined. British guns were the primary target, however, and they soon suffered as well. Many were silenced by the middle of October 10th, and British return fire averaged only six rounds per hour that day.
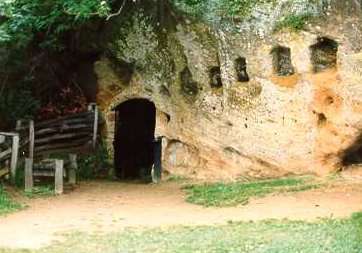

"Cornwallis" Cave and Yorktown Waterfront
With nowhere in the town safe from Allied artillery, Cornwallis and civilians sought safety in the caves along the bluffs near the river. Above is one such cave preserved by the park service. When Benson Lossing visited in the 19th century, he was told that Cornwallis took cover in a cave around 1/4 mile away, and that the cave shown here had been dug to protect a family's valuables. Demoralized British troops flocked to the bluffs and caves to avoid cannon fire. An occasional long shot would hit a British ship in the river.
As the siege dragged on, Cornwallis ran low on food, and he was forced to kill his horses. Dumped in the river, they floated in and out with the tide and were a health risk as they decomposed. The lack of horses also eliminated Cornwallis's mobility, making an escape difficult even if the British had been able to break out.
Cornwallis had created a barrier of sunken ships in the river just in front of the town. During my visit, a lady fishing here told me that her line frequently got snagged on the remains. At least one account of the siege mentions a trail along the riverbank to Redoubt Number 10, which was perched on the bluffs overlooking the river. In the panorama, this is the area to the left of the left flank of the British line. Tue Point is at the mouth of the York River.