Yorktown Part 3
Secretary Thomas Nelson House
Cornwallis had made his headquarters in 65 year old Secretary Thomas Nelson's house, which soon came under fire. It would not survive the siege. At noon on October 10th, under a brief flag of truce, the Secretary was allowed to leave town despite that fact that he could provide the Allies with useful information. Nelson related that the bombardment was very effective, that troops were taking cover below the bluffs, and that the British were killing their horses, gradually sacrificing any remaining ability to maneuver should the opportunity arise. Nelson also told Washington that Cornwallis had received notice from Clinton that the relief force was scheduled to leave New York Harbor on October 12th. Considering the damage he had suffered in just a day, this news could not have been encouraging to Cornwallis.
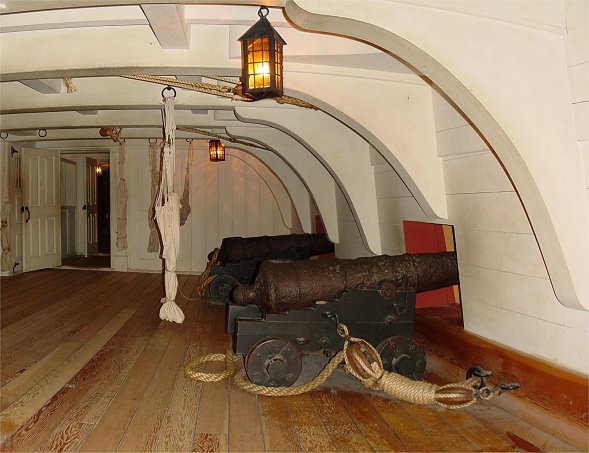
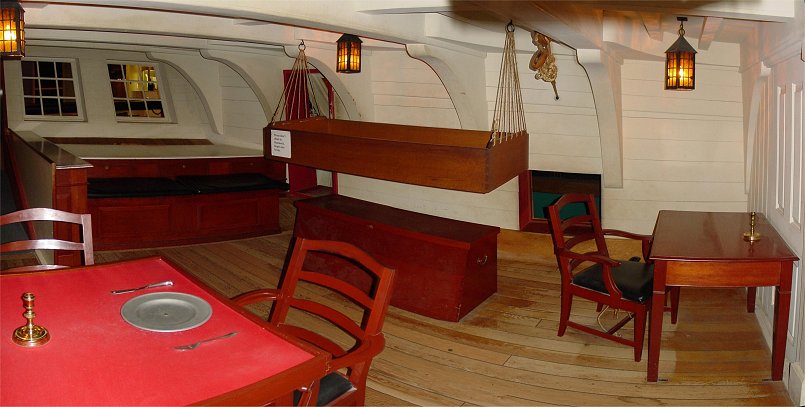
HMS Charon Exhibit in NPS Visitors Center
French batteries near the Fusiliers' Redoubt also fired on British shipping off of Yorktown. On the night of October 10th, the Charon was hit with hot shot and burned along with the Guadeloupe, both of which had been largely disarmed of cannon, which were then used to defend the town. The resulting fires were a highlight of the siege for many participants.

Governor Thomas Nelson Jr's House was built by his grandfather in 1730.
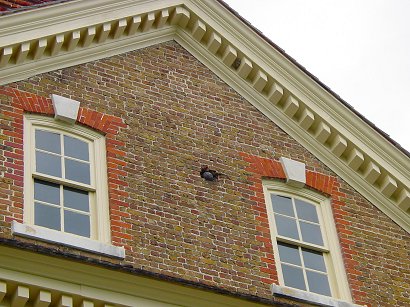
Damage can be seen on outer walls, but the cannonballs were added during early 1900s. Nelson is said to have directed fire at own house.

The generous use of space for stairs was a sign of wealth.
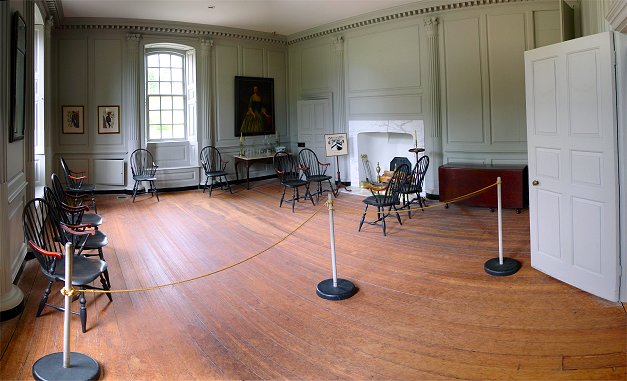
Dining Room
Gov. Nelson House
Allied artillery batteries on the first siege line were ready for action on October 9th. On the 10th, 46 guns were firing on Yorktown and reduced British fire to just six rounds an hour. Secretary Thomas Nelson had left Yorktown under a flag of truce and confirmed the damage being wrought and added that a British relief force was on the way. According to legend, his nephew Governor Thomas Nelson was invited to the opening of a new battery, and he ordered the gunners to open fire on his own house, the one shown here, which he believed to be Cornwallis' headquarters. The year before Nelson had used his own wealth and credit to help sustain the Revolution, and he died bankrupt, his enormous sacrifices for his country unappreciated.
For more of the buildings in town, see Colonial Yorktown.
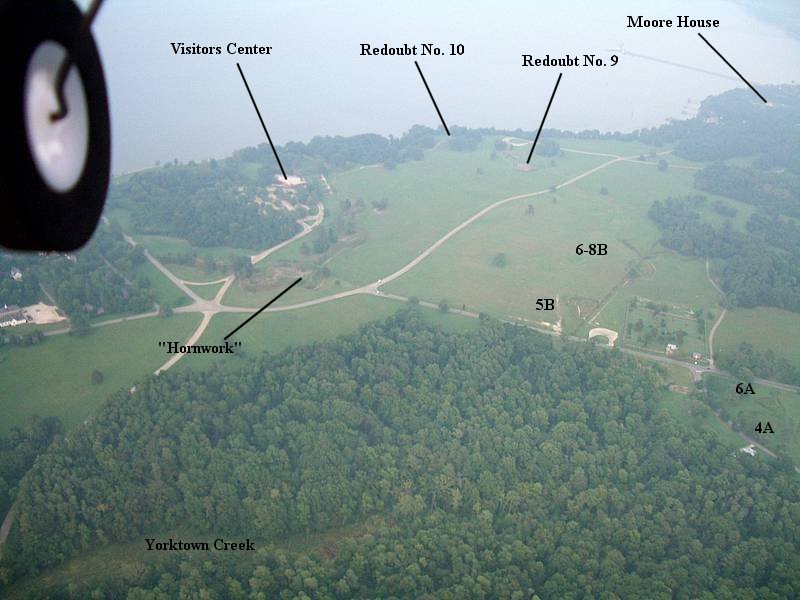
Courtesy of Tim Timmons
This aerial photo shows a few parts of the Grand French Battery on the right and parts of the Second Parallel closer to the British lines, the most prominent part being the Hornwork. Until Redoubts 9 and 10 were captured, the Second Parallel couldn't be completed.

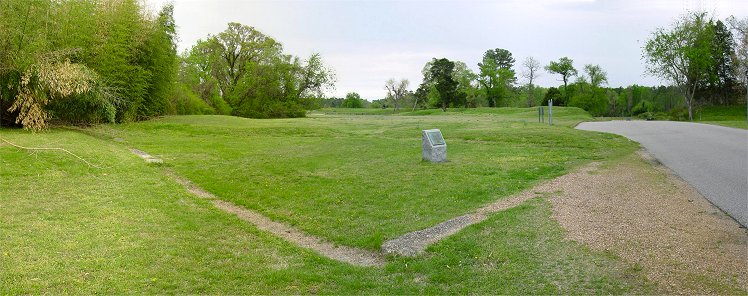
Redoubts 9 and 10
On the night of October 11th and 12th, work had begun on the second siege line even closer to the British defenses. British Redoubts 9 and 10 near the bluffs had to be stormed before the siege line could be completed. This is the view looking east behind the forts, with Redoubt 10 on the far left along the bluffs with the York River in the background and Redoubt 9 on the far right. The earthworks connecting the two were completed after the forts were taken. Both forts were protected by fraising, or sharpened logs around the walls, and abatis, or fallen trees with sharpened points.
On the night of October 14th, 400 Americans under Alexander Hamilton stormed Redoubt Number 10 while 400 Frenchmen under Col. Duex-Ponts stormed Redoubt Number 9. Being eager to come to grips with the enemy, and perhaps not being burdened with formality, the Americans proceeded directly through the abatis and fraising without waiting for the pioneers to chop them away. The Continental Army had come a long way in six years of war, and the troops successfully stormed the fort with the bayonet in about ten minutes. A proud Lafayette offered to assist the French, but the situation was under control.

Redoubt Number 9
This pan was taken from the ramparts of the reconstructed Redoubt Number 9. The earthworks in the left background are the British inner defenses, and Redoubt Number 10 is visible between some trees above the entrance to Redoubt Number 9. The mortar faces the general direction of the French attack.
The French took greater casualties in their efforts than the Americans. After being challenged several times with "Wer da?", or "Who goes there?", the French were fired upon with musketry. Redoubt Number 9 still had much of the abatis intact, so they waited for the pioneers to clear the obstacles. The troops were soon in the fort and took it in hand to hand combat.
The Americans lost 9 killed and 25 wounded taking a fort occupied by 45 to 60 men. The French lost 15 killed and 77 wounded taking a fort occupied by around 120 men. With the redoubts taken, work immediately started extending the siege lines to them. That night, the 2nd Parallel reached the redoubts, a sap was begun up from the 1st Parallel, and the redoubts were connected. Because of low ground you can see between the two, the connection was curved and not direct.

Allied Battery
In Redoubt 10, four howitzers and three mortars were mounted. Between the two captured redoubts, new batteries were begun. Because of a depression near Redoubt 10, the new battery was constructed near Redoubt Number 9. At some point during the siege, it contained 7-18 pounders, 3-24 pounders, 8 mortars, and 4 howitzers, but it was made to hold as many as 22 pieces.
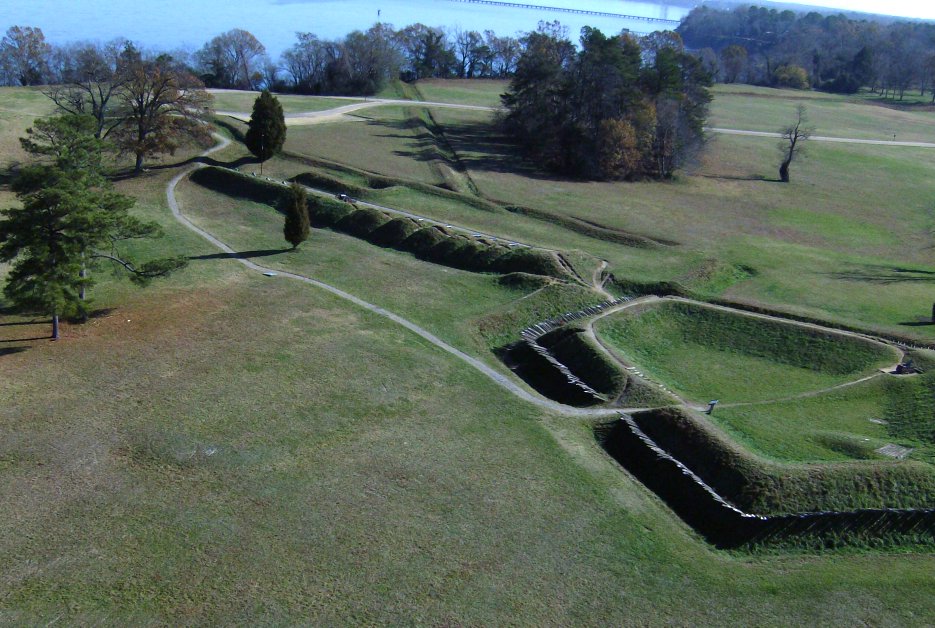
Aerial View Courtesy of Todd Ferrante
Redoubt Number 9 is the prominent fort on the right. Attached to it in the center of the photo is the Allied battery constructed after the capture of R9. The York River is visible in the background, and the trench advancing from the first siege line can be seen parallel to the bluffs overlooking the river. The full extent of this trench, which extended to Redoubt Number 10 off the picture to the left has eroded away into the river. A trench connecting to the rear of the Allied battery can also be seen.

2nd Parallel Seen From British Inner Defenses
With the redoubts taken and new batteries constructed, the Allies could enfilade and pound the British Inner Defenses at close range. This is the view from the British Inner Defenses looking at the second siege line showing the impressive array of Allied works. 11B was between Redoubts 9 and 10, and off the picture to the right was additional ordnance, roughly 6-24 pounders, 10 mortars, and 2 howitzers. Seeing this newly completed parallel, it was clear to Cornwallis that there was little hope.
Note: The exact dimensions of the British defenses remain unknown but are thought to have been much weaker than what exists now, which are actually Confederate earthworks. Civil War buffs may be interested to know that Phillip Sheridan is visible on the right of the pan.
Back to Revolutionary War Virtual Battlefield Tours