Saltville Part 2
Zoom on Main Area of the Battle
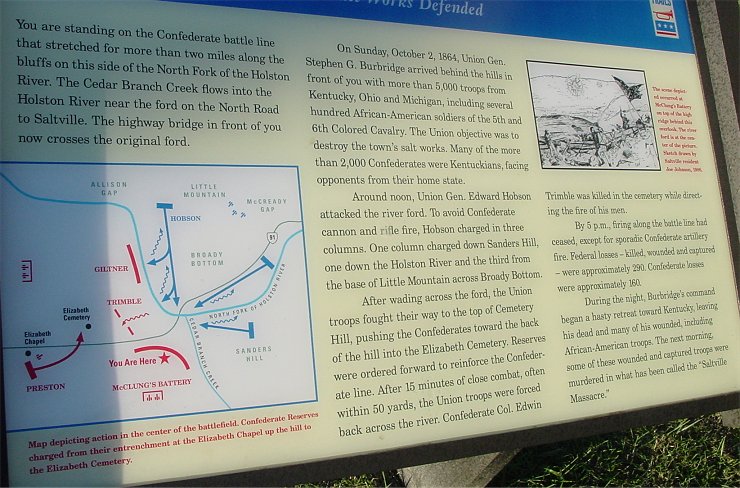
Burbridge sent Hanson's brigade against the Saltville Gap area while Hobson's brigade attacked the Confederate positions at the cemetery. This Union brigade deployed in the flat ground near the large white buildings and advanced toward the present-day bridge across the river. Confederate fire pushed them further right, where they forded the river and scaled the bluffs into the cemetery.
Ratliff's brigade, which included the 5th US Colored Cavalry had crossed further east, pushed a few Confederates off Sanders Hill and deployed to attack the newly arrived brigades of Felix Robertson and George Dibrell just across Cedar Branch at the foot of Chestnut Ridge. After brief hand to hand combat, the Confederates fell back to crude field fortifications halfway up the hill. Several hours of battle passed and the Confederates began to run low on ammunition, leading Dibrell's brigade to withdraw up and over the hill past McClung's battery supporting them. Pressed by Union troops on his exposed flank, Robertson fell back also. Fire from an artillery position nearer town and lack of ammunition discouraged further Union advances.

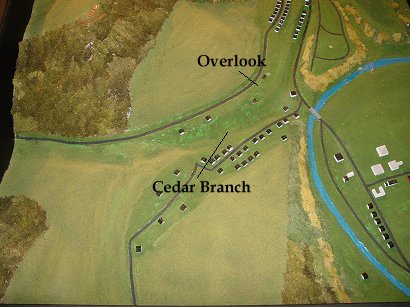
From the Overlook
This is the view from the eastern end of Chestnut Ridge. The bridge at the center of the picture is the site of the ford attacked by Hobson. The wooded hill on the left is the cemetery stormed by Union troops. On the far right is Chestnut Ridge. Union troops approached it from the distant Sanders Hill on the right. See the Civil War Trails explanation and map.
Back to Civil War Virtual Battlefield Tours